
When you face issues with a solenoid valve, always start by turning off the power and checking for visible damage. Use the right tools for each step. Stay safe by wearing gloves and goggles. Quick checks and careful actions help you solve most problems fast.
Key Takeaways
- Always turn off power and wear proper safety gear before working on solenoid valves to prevent injury.
- Check for simple issues first like power supply, dirt, and pressure before moving to complex repairs.
- Regular inspection, cleaning, and testing keep solenoid valves working well and help avoid costly breakdowns.
Solenoid Valve Safety Precautions
Power Off and Lockout Procedures
You must always turn off the power before you work on a solenoid valve. This step keeps you safe from electric shock. Use a lockout device to make sure no one turns the power back on while you work. Place a tag on the switch to warn others.
Tip: Double-check the power with a voltage tester before you start any repairs.
Use of Personal Protective Equipment
Wear the right personal protective equipment (PPE) every time you handle a solenoid valve. Gloves protect your hands from sharp edges and hot surfaces. Safety goggles keep your eyes safe from splashes or flying debris. If you work in a noisy area, use ear protection.
- Gloves
- Safety goggles
- Ear protection (if needed)
Verifying System Pressure
Check the system pressure before you remove or inspect the solenoid valve. High pressure can cause sudden leaks or injuries. Release any trapped pressure using the correct valve or vent.
Note: Never try to open a valve if you are unsure about the pressure level. Always use a pressure gauge to confirm it is safe.
Solenoid Valve Not Opening
Common Causes
When you notice that your solenoid valve does not open, several issues might be the reason. You can check for these common causes:
- No electrical power reaches the coil.
- The coil has burned out or failed.
- Dirt or debris blocks the valve.
- The pressure difference is too low for the valve to operate.
- The plunger or internal parts have become stuck.
- The manual override is in the wrong position.
Tip: Always start by checking the simplest cause first, like power supply or visible dirt.
Diagnostic Steps
You can follow these steps to find out why your solenoid valve will not open:
-
Check the Power Supply:
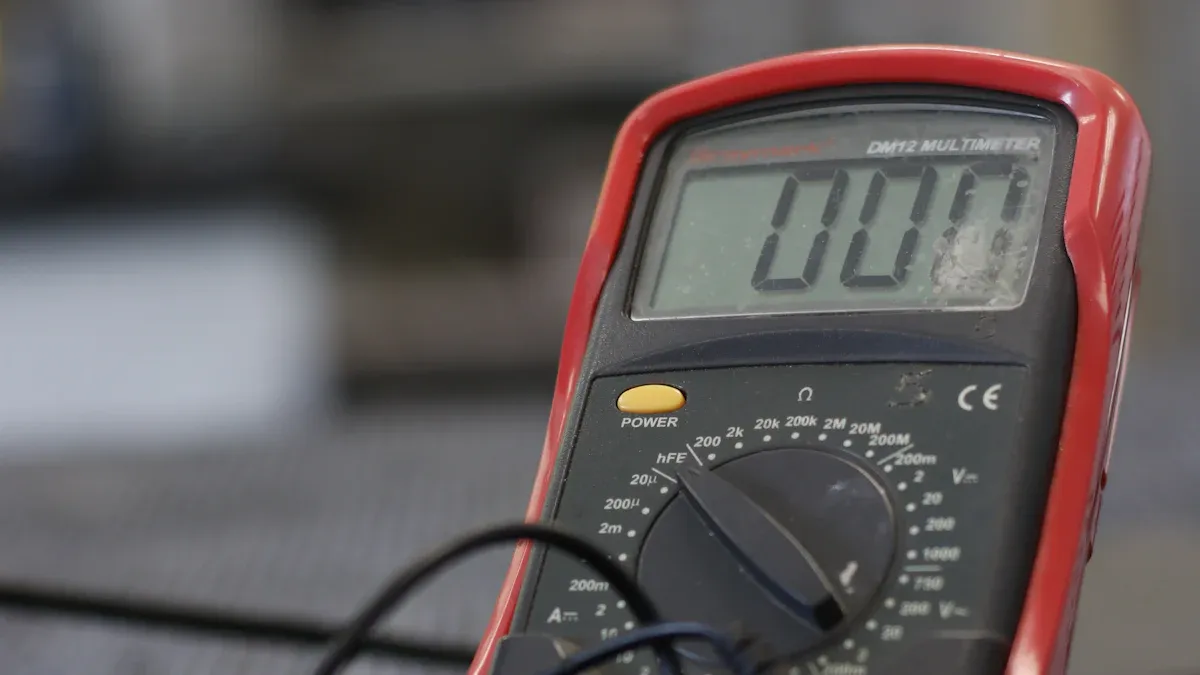
Use a multimeter to test if electricity reaches the coil. If there is no power, inspect the wiring and control system. -
Inspect the Coil:
Touch the coil carefully. If it feels cold, it may not receive power. If it feels very hot, it may have burned out. -
Listen for a Click:
When you apply power, listen for a clicking sound. No sound means the plunger does not move. -
Look for Blockages:
Remove the valve and check for dirt or debris inside. Clean out any blockage you find. -
Check System Pressure:
Use a pressure gauge to make sure the pressure meets the valve’s requirements. -
Test the Manual Override:
Make sure the manual override is not set to keep the valve closed.
| Step | What to Check | What to Do Next |
|---|---|---|
| Power Supply | Voltage at coil terminals | Fix wiring if needed |
| Coil Condition | Temperature and appearance | Replace if damaged |
| Valve Movement | Listen for click | Inspect plunger |
| Internal Blockages | Dirt or debris inside valve | Clean valve |
| System Pressure | Pressure gauge reading | Adjust system pressure |
| Manual Override | Override position | Reset if needed |
Actionable Solutions
You can fix a solenoid valve that does not open by following these solutions:
- Restore power to the coil if you find a wiring problem.
- Replace the coil if it has burned out or shows damage.
- Clean the valve body and remove any dirt or debris.
- Adjust the system pressure to meet the valve’s needs.
- Lubricate the plunger if it sticks, or replace worn parts.
- Set the manual override to the correct position.
Note: If you try these steps and the solenoid valve still does not open, you may need to contact a professional for further help.
Solenoid Valve Not Closing
Common Causes
You may find that your solenoid valve does not close when it should. Several issues can lead to this problem:
- Dirt or debris blocks the valve seat.
- The plunger or spring inside the valve sticks.
- The coil receives constant power.
- The valve body or diaphragm suffers damage.
- Incorrect installation affects the valve’s function.
Tip: Always check for simple problems first, such as dirt or stuck parts.
Diagnostic Steps
You can follow these steps to find out why the valve stays open:
-
Check the Power:
Use a multimeter to see if the coil still gets power. The valve cannot close if the coil stays energized. -
Inspect for Debris:
Remove the valve and look for dirt or particles on the seat or plunger. -
Test the Plunger Movement:
Gently move the plunger by hand. It should move freely without sticking. -
Examine the Valve Parts:
Look for signs of wear or damage on the diaphragm, spring, or valve body. -
Review Installation:
Make sure you installed the solenoid valve in the correct direction and position.
Actionable Solutions
You can fix a solenoid valve that will not close by taking these actions:
- Cut power to the coil if it stays on by mistake.
- Clean the valve seat and plunger to remove any debris.
- Replace worn or damaged parts, such as the diaphragm or spring.
- Lubricate moving parts if they stick.
- Reinstall the valve if you find it in the wrong position.
Note: If the valve still does not close after these steps, you may need to call a professional for help.
Solenoid Valve Opens or Closes Partially
Common Causes
You may notice that your solenoid valve does not open or close all the way. This problem can happen for several reasons:
- Dirt or debris blocks the valve’s moving parts.
- The coil does not get enough voltage.
- The plunger or spring inside the valve has worn out.
- The system pressure is too low or too high.
- The valve body has damage or corrosion.
Tip: Always check for dirt or debris first. This is the most common cause of partial movement.
Diagnostic Steps
To find out why your valve only moves partway, follow these steps:
- Turn off the power and release system pressure.
- Remove the solenoid valve from the system.
- Inspect the inside for dirt, rust, or buildup.
- Check the coil voltage with a multimeter. Compare the reading to the valve’s rating.
- Move the plunger by hand. It should slide smoothly.
- Examine the spring and other parts for signs of wear or damage.
- Use a pressure gauge to check if the system pressure matches the valve’s needs.
| Step | What to Look For | What to Do Next |
|---|---|---|
| Visual Inspection | Dirt, rust, or buildup | Clean the valve |
| Coil Voltage | Low or unstable reading | Fix power supply |
| Plunger Movement | Sticking or rough motion | Lubricate or replace |
| System Pressure | Too high or too low | Adjust pressure |
Actionable Solutions
You can fix a solenoid valve that opens or closes only partway by:
- Cleaning out all dirt and debris from the valve body.
- Repairing or replacing the coil if it does not get enough voltage.
- Lubricating or replacing the plunger and spring if they stick or show wear.
- Adjusting the system pressure to the correct level.
- Replacing the valve if you see damage or corrosion that cannot be fixed.
Note: If you try these steps and the valve still does not work right, contact a professional for help.
Solenoid Valve Makes Unusual Noise
Common Causes
You might hear buzzing, humming, or clicking from your solenoid valve. These sounds often point to a problem. Here are some common causes:
- Loose or vibrating coil
- Dirt or debris inside the valve
- Incorrect voltage supplied to the coil
- Worn or damaged internal parts
- High system pressure
Tip: Unusual noise often means something is not working as it should. Do not ignore these sounds.
Diagnostic Steps
You can follow these steps to find out why your solenoid valve makes noise:
- Listen to the type of noise. Buzzing often means electrical issues. Clicking may point to mechanical problems.
- Check the coil for tightness. Gently touch it to see if it moves.
- Use a multimeter to check the voltage at the coil terminals. Compare it to the valve’s rating.
- Remove the valve and inspect for dirt or debris inside.
- Look for worn or broken parts, such as the plunger or spring.
- Measure the system pressure with a gauge.
| Noise Type | Possible Cause | What to Check |
|---|---|---|
| Buzzing | Electrical issue | Coil voltage |
| Clicking | Mechanical problem | Plunger, spring |
| Humming | Loose coil or debris | Coil, valve interior |
Actionable Solutions
You can fix a noisy solenoid valve by taking these actions:
- Tighten the coil if it feels loose.
- Clean out any dirt or debris from inside the valve.
- Adjust the voltage supply to match the valve’s rating.
- Replace worn or damaged parts, such as the plunger or spring.
- Lower the system pressure if it is too high.
Note: If the noise continues after you try these steps, you should contact a professional for further help.
Solenoid Valve Coil Overheating or Burnout
Common Causes
You may notice the coil on your solenoid valve gets very hot or even burns out. Several things can cause this problem:
- The coil receives the wrong voltage.
- The coil stays energized for too long.
- Dirt or debris blocks the plunger, causing the coil to work harder.
- The environment around the valve is too hot.
- The coil has poor ventilation.
Tip: Always check the power supply and the area around the valve first.
Diagnostic Steps
You can follow these steps to find out why the coil overheats or burns out:
- Use a multimeter to check the voltage at the coil terminals. Make sure it matches the coil’s rating.
- Touch the coil carefully. If it feels hotter than usual, turn off the power right away.
- Inspect the plunger and valve body for dirt or blockages.
- Look at the installation area. Make sure nothing blocks airflow around the coil.
- Check if the coil stays powered longer than needed.
| Step | What to Check | What to Do Next |
|---|---|---|
| Voltage | Coil rating vs. supply | Adjust power supply |
| Coil Temperature | Hot to the touch | Turn off power |
| Internal Blockages | Dirt or debris | Clean valve |
| Ventilation | Airflow around coil | Improve ventilation |
Actionable Solutions
You can fix coil overheating or burnout by taking these actions:
- Adjust the power supply to match the coil’s voltage rating.
- Set up a timer or control system so the coil does not stay on too long.
- Clean the solenoid valve to remove any dirt or debris.
- Move the valve to a cooler area or improve airflow around it.
- Replace the coil if you see signs of damage or melting.
Note: If the coil keeps overheating after you try these steps, you should contact a professional for help.
Solenoid Valve Troubleshooting Checklist
Quick Reference Table
When you troubleshoot a solenoid valve, you need a clear and simple checklist. This table helps you find problems fast and choose the right solution. Keep it nearby when you work on any valve.
| Problem | What to Check | Quick Fixes |
|---|---|---|
| Valve does not open | Power supply, coil, debris | Restore power, replace coil, clean valve |
| Valve does not close | Coil power, debris, spring | Cut power, clean, replace spring |
| Valve opens/closes partially | Dirt, voltage, pressure | Clean, fix power, adjust pressure |
| Valve makes noise | Coil, debris, voltage | Tighten coil, clean, check voltage |
| Coil overheats | Voltage, airflow, blockage | Adjust voltage, improve airflow, clean valve |
Post time: Jun-20-2025