
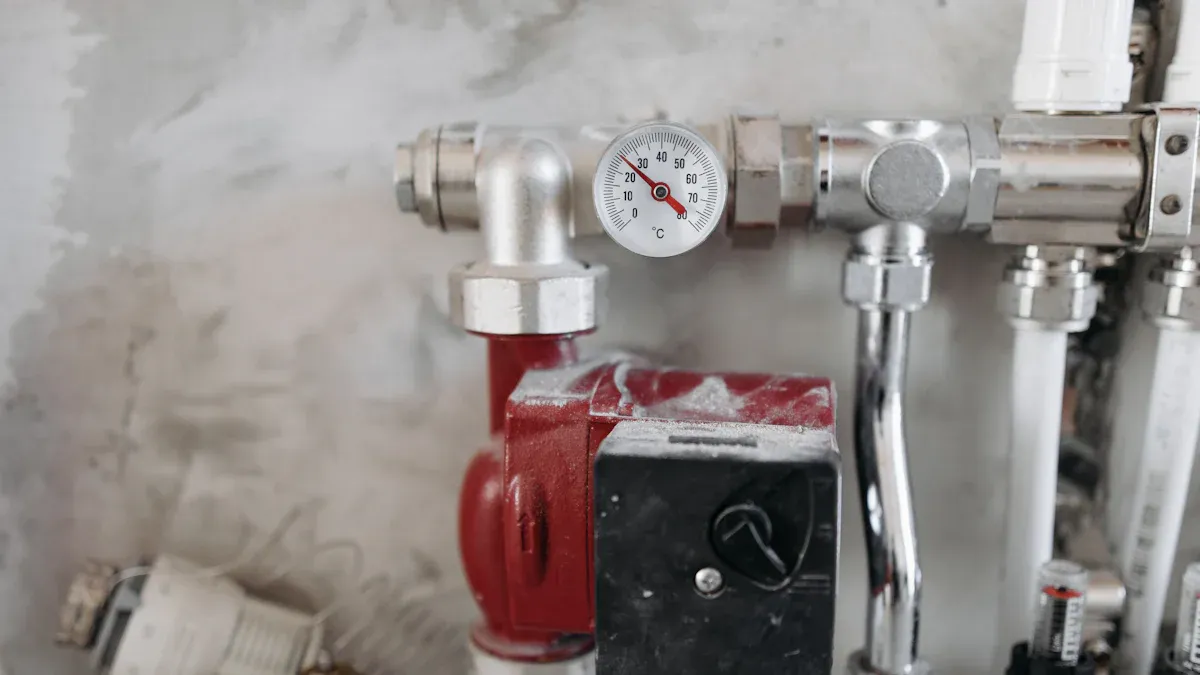
Regulating valve hunting describes a control loop instability. The regulating valve continuously oscillates around its setpoint. This causes noticeable fluctuations in process variables like pressure or flow. Operators often hear unusual noises. This instability negatively impacts process efficiency. It leads to reduced product quality and increased energy consumption.
Key Takeaways
- Regulating valves hunt when they constantly move back and forth around the right setting. This causes problems like uneven pressure or flow, which wastes energy and lowers product quality.
- Many things can make a valve hunt, like being too big, having a bad sensor line, or having blocked vents. Fixing these issues helps the valve work smoothly.
- To stop valve hunting, check the valve’s size, fix sensor line problems, and make sure the control system is set up correctly. Regular checks and good maintenance keep the valve stable.
Why Your Regulating Valve Hunts: Common Causes
Several factors contribute to a regulating valve’s unstable behavior. Understanding these root causes is crucial for effective diagnosis and resolution.
Inadequate Downstream Volume for the Regulating Valve
Insufficient downstream volume often leads to rapid pressure changes when the regulating valve opens or closes. These quick pressure fluctuations cause the regulator to receive incorrect flow demand signals, resulting in erratic control. A small downstream pipe volume, for instance, can create this issue. Even if the overall downstream volume appears adequate, restricted downstream piping, such as orifice plates or block valves, can mimic a small volume system. Similarly, a small downstream stripper vapor holdup volume contributes to fluctuating pressure. Minor transients during stripper operation occur too quickly for a simple regulator to respond effectively.
A sufficient downstream volume acts as a buffer, preventing the regulating valve from fluttering or rapidly opening and closing. For traditional control valves, a common guideline suggests they should account for at least 25%, and ideally 50%, of the total system pressure drop. This ensures effective control and prevents issues like hunting or oscillation. However, certain advanced valve designs can achieve stable control even at very low ratios, effectively sidestepping typical valve authority limitations.
Poor Sense Line Placement Affecting Regulating Valve Response
The placement of the sense line significantly impacts a regulating valve’s ability to respond accurately. Incorrect placement introduces measurement lag, which can lead to instability. For optimal performance, keep the control line as short and straight as feasible. This enables quicker sensing and response to pressure changes. Minimize restrictions such as elbows, tees, and valves. If isolation valves are necessary, use full port types. Connect the control line 6 to 10 pipe diameters downstream from any turbulence-generating components like valves, swages, or elbows. Pressure is controlled precisely at the tie-in point of the control line, not at the regulator itself. Ensure the regulator and upstream equipment’s design pressure meet safety requirements. Start with the regulator’s connection size for the control line diameter. Increase the diameter for every 10-15 feet of run.
For pilot-operated Pressure Reducing Valves (PRVs), the sensing line should be straight, not a flex tube, and sloped towards the downstream side. This prevents condensate buildup, which could hinder the PRV’s ability to accurately sense downstream pressure. A recommended pitch is 10 to 1. Incorrect sense line placement, such as connecting a differential-pressure (DP) transmitter’s bottom leg to a makeup line 30 feet upstream of a tank instead of directly to the tank, introduces measurement lag. This setup causes pressure spikes from valve changes to directly impact the level measurement due to the inertia of the water in the pipe. These pressure spikes travel through the system, leading to successive wild swings in level indication and an inaccurate representation of the actual tank level.
Oversized Regulating Valves and Their Impact
Oversized control valves present a common problem. Even a small change in valve position can significantly impact the flow, making precise control difficult. This often leads to instability and erratic behavior. An oversized valve struggles to precisely meet the desired flow or pressure set point, leading to constant overcorrection. It repeatedly shuts, opens, and shuts again, creating an unstable, erratic process.
Consequences of Oversized Regulating Valves:
- Water Hammering: The valve closes violently, which can stretch and compromise the valve stem. It also stresses the coupling block and valve seat, potentially leading to breakage.
- Premature Wear: An oversized valve results in a high stroke count, accelerating the wear of valve trim and packing. This leads to deterioration and poor performance.
- Inadequate Pressure Regulation: This leads to operational inefficiency and compromises the system’s ability to maintain consistent gas flow.
- Safety Concerns: Insufficient pressure reduction can result in dangerously high pressure delivered to appliances.
- Inconsistent Pressure: The oversized regulator may not maintain consistent pressure under varying demand conditions. This affects appliance operation and potentially reduces their lifespan and efficiency.
- Complications in Installation and Maintenance: These issues make the overall system less reliable.
Obstructed Venting or Trapped Air Around the Regulating Valve
Obstructed venting prevents air from flowing in and out of the spring case vent hole as designed. This leads to regulator instability. The instability manifests as the regulator opening and closing too frequently instead of throttling smoothly to match flow demand. This erratic movement can cause outlet pressure fluctuations and a ‘chatter’ or ‘buzzing’ noise. Common causes of obstructed venting include a plugged vent, inadequately-sized vent piping, or a bypassed vent assembly. Trapped air around the regulating valve can also create a similar effect, preventing smooth operation and leading to erratic responses.
Faulty Positioner or Actuator Issues with the Regulating Valve
A problematic positioner often causes control valve hunting. Foreign material deposited on the I/P’s air filter within the positioner is a specific issue leading to hunting behavior. This problem has been observed across multiple positioners, and replacing the air filter resolves it. Other common failure modes for positioners include calibration drift, faulty I/P converters, and plugged pneumatic lines. The accumulation of dirt between the nozzle and the baffle in a positioner can also cause hunting. This dirt affects the back pressure of the nozzle, which impacts the positioner’s output, leading to an unstable control valve and oscillation.
What appears to be an actuator problem might actually be a valve problem in many cases. Before disassembling the actuator, put the unit into manual override for electric actuators and attempt to operate the valve manually. If the valve still does not move, the problem is likely with the valve itself. If it operates in manual mode, then the actuator is the probable cause. Common valve issues that can mimic actuator problems include a worn-out valve stem, seized packing, an obstruction, or excessive torque.
Diagnostic Tests for a Faulty Actuator:
- Disconnect the actuator from the power source or control system for safety.
- Inspect the actuator for visible damage or loose connections.
- Use a multimeter to check the continuity of electrical connections to identify wiring issues or open circuits.
- Apply power to the actuator and observe its response; erratic or no movement indicates a potential problem.
- Manually move the actuator to check for smooth operation and any resistance or binding.
- Test the actuator under different operating conditions to ensure functionality across its entire range.
- Monitor the actuator’s response time and compare it to specified values.
- Use diagnostic tools or sensors to measure and verify output parameters like position, force, or torque.
Modern electric motor-operated valve actuators offer sophisticated diagnostics, especially when combined with networking protocols. These diagnostics are crucial for asset management, predictive maintenance, troubleshooting, and scheduled maintenance. They allow for proactive servicing and limit costly failures.
Improper Control Loop Tuning for the Regulating Valve
Aggressive integral action, characterized by a high reset rate, can lead to overcompensation. This causes oscillations to grow and results in hunting or closed-loop instability. Similarly, an aggressive derivative action can independently cause hunting, particularly in processes that react quickly to control efforts. These actions exacerbate rather than regulate valve hunting.
Proper PID controller tuning is crucial for stable and efficient results. Poor tuning can lead to oscillations, sluggish responses, and safety issues. Tuning is not a one-size-fits-all process; various approaches exist based on plant dynamics, operational goals, and controller architecture. Manual tuning methods, such as trial-and-error, are suitable for simple loops but require deep process knowledge and can be time-consuming. Automatic tuning software streamlines the process and produces consistent results in complex systems.
Tuning is a corrective action to improve performance, while monitoring is preventative. It provides visibility into loop behavior and highlights issues before they escalate. Optimal performance requires a methodical approach to tuning, starting with a bump test to stimulate the system and reveal its dynamic behavior. This data is then used in modeling to determine ideal PID parameters. Tuning must align with the Design Level of Operation (DLO), as incorrect parameters can cause instability or excessive equipment wear. Validation, by comparing post-tuning performance against baseline data, is essential for continuous improvement.
Lambda tuning is a methodology that allows users to select a closed-loop response time, known as lambda, to calculate corresponding tuning parameters. This lambda value is chosen to achieve desired process goals and stability criteria. For instance, a small lambda can be selected for good load regulation, while a larger lambda can minimize changes in controller output and manipulated variables by allowing the process variable to deviate from the set point. A shorter lambda leads to more aggressive tuning and less stability margin, whereas a longer lambda results in less aggressive tuning and more stability margin. A recommended starting point for stability, especially when potential changes in process dynamics are unknown, is to set lambda equal to three times the larger of the dead time or time constant. This provides stability even if dead time and process gain double.
Guidelines for Preventing Regulating Valve Instability through Tuning:
- Understand the process before tuning a controller.
- Verify the performance of instrumentation and the final control element, typically a control valve.
- Ensure the control valve has a small deadband and resolution.
- Confirm the control valve has an appropriate and consistent flow gain.
- Verify the control valve’s response time is suitable for process performance requirements.
- Review the control scheme to ensure it is appropriate and linear for the application.
- Review and understand the interaction of the control loop to be tuned with other control loops.
- Base the desired aggressiveness of loop tuning on the interaction with other loops and the consequences of controller output movement.
Diagnosing Regulating Valve Instability

Diagnosing regulating valve instability requires a structured approach. Technicians must systematically eliminate potential causes to pinpoint the root of the problem.
Systematic Diagnostic Steps for Regulating Valve Hunting
A systematic diagnostic procedure begins with safety.
- Safety First – Isolation and Preparation Steps: This involves LOTO (Lock Out, Tag Out), isolating the process by closing block valves or bypassing, and securing energy sources (electrical, air, hydraulic). These actions ensure safety before any physical interaction with the valve.
- Verify the Control Signal: Technicians confirm the control command chain, from the DCS/PLC to the valve positioner, functions correctly. This involves measuring the 4-20mA signal, checking HART communication, and verifying the I/P (current-to-pneumatic) output.
- Air Supply: This step checks if the air supply to the actuator is adequate (20-30 psi), free of leaks, and clean. If the air supply is not okay, it points to issues with the filter, tubing, solenoid, or leaks. If the air supply is good, a manual stroke test is performed.
Analyzing Process Data for Regulating Valve Oscillations
Analyzing historical process data provides crucial insights into regulating valve oscillations.
- Scatter plots are useful for uncovering hidden oscillations caused by overtuned control loops.
- Control Loop Performance Monitoring (CLPM) software is essential for identifying poorly tuned controllers and valve problems, helping prioritize corrective actions.
- Algorithms are powerful for detecting critical issues like oscillations and valve stiction, improving overall system performance. Plotting the manipulated variable (valve position) against the controller output is key to identifying stiction, which causes oscillations. This often reveals ‘stick and slip’ movements, where the valve gets stuck and then suddenly moves.
Inspecting Physical Components of the Regulating Valve System
Physical inspection of the regulating valve system can reveal obvious issues. Technicians should look for visible damage, leaks, or obstructions in the valve body, actuator, and associated piping. They also check for proper mounting and alignment of components.
Testing Regulating Valve Response in Manual Mode
Testing the regulating valve in manual mode helps assess its mechanical integrity and responsiveness. Operators can directly command the valve to specific positions and observe its movement.
| mA Signal | Expected Valve Travel Percentage |
|---|---|
| 3.8 mA | Hard closed |
| 4.0 mA | Closed |
| 4.2 mA | Slightly off its seat |
| 12 mA | 50% |
| 19.8 mA | Near full open |
| 20.0 mA | Fully open |
| 20.2 mA | Hard open (resting on stop) |
Manual globe valves may become unstable at a stem travel of 20% or less. Guidelines typically recommend the valve be at least 20% open when in use to prevent instability and ensure proper operation.
Solving Regulating Valve Hunting: Practical Solutions
Addressing regulating valve hunting requires a multi-faceted approach. Engineers and technicians must implement practical solutions across system design, control loop tuning, maintenance, and component selection.
Optimizing System Design for Regulating Valve Stability
System design plays a crucial role in preventing regulating valve instability. Thoughtful design choices can create a more robust and predictable control environment. One effective strategy involves implementing feedforward control. This method enhances stability by anticipating the impact of measured disturbances on the process variable (PV). It then deploys preemptive control actions. This allows the system to counteract impending disruptions in a timely fashion. This significantly improves disturbance rejection performance.
Feedforward control is particularly valuable for specific, disruptive disturbances that cause repeated, costly disruptions to stable operation. By measuring the disturbance before it reaches the PV, the system gains time to compute and implement these preemptive actions. An identifiable disturbance significantly affects the measured variable, despite feedback control attempts to regulate these effects. This disturbance can be measured, potentially with additional instrumentation.
In control engineering, a feedforward control system utilizes sensors to detect disturbances affecting the system. It then applies an additional input to minimize the disturbance’s effect. This approach requires a mathematical model of the system to accurately predict the impact of disturbances. This allows measurement and accounting for them before they can affect the system. The challenge lies in accurately predicting disturbance effects and ensuring no unmeasured disturbances are present.
An ideal feedforward controller is represented by the negative ratio of the disturbance transfer function divided by the process transfer function: $$G_{ff} = -\frac{G_d}{G_p}$$. For many implementations, the feedforward control gain is approximated as a ratio of the disturbance and process gains: $$K_{ff} = -\frac{K_d}{K_p}$$. This approximation is effective when disturbance and controller output dynamics are similar. This is common in chemical process control where both are physical inputs to the same control volume. Feedforward trim is often integrated into a PID controller by adding a term based on the measured disturbance: $$u(t) = u_{bias} + K_c , e(t) + \frac{K_c}{\tau_I}\int_0^t e(t)dt – K_c \tau_D \frac{d(PV)}{dt} + K_{ff},d$$.
The ‘feed forward with feedback trim’ architecture is a widely adopted industrial solution for improved disturbance rejection. It combines the preemptive capabilities of a feedforward element for a particularly disruptive disturbance with a traditional feedback control loop. The feedback loop handles other unmeasured disturbances and external influences. It also provides set point tracking capability. It corrects for inevitable simplifying approximations in the feedforward element’s predictive model, which can make preemptive disturbance rejection imperfect.
Adjusting Control Loop Parameters for the Regulating Valve
Properly adjusting control loop parameters is essential for eliminating hunting. Engineers must carefully tune PID controllers to achieve stable and efficient operation. Aggressive integral or derivative actions can exacerbate oscillations. Therefore, a methodical approach to tuning is necessary. This often involves starting with a bump test to stimulate the system and reveal its dynamic behavior. This data is then used in modeling to determine ideal PID parameters.
Tuning must align with the Design Level of Operation (DLO). Incorrect parameters can cause instability or excessive equipment wear. Validation, by comparing post-tuning performance against baseline data, is essential for continuous improvement. Lambda tuning is a methodology that allows users to select a closed-loop response time, known as lambda, to calculate corresponding tuning parameters. This lambda value is chosen to achieve desired process goals and stability criteria. A shorter lambda leads to more aggressive tuning and less stability margin, whereas a longer lambda results in less aggressive tuning and more stability margin. A recommended starting point for stability, especially when potential changes in process dynamics are unknown, is to set lambda equal to three times the larger of the dead time or time constant. This provides stability even if dead time and process gain double.
Maintaining Regulating Valve and System Integrity
Regular maintenance of the regulating valve and its associated system components is critical for preventing hunting. Physical issues like wear, damage, or obstructions often lead to instability.
- Regular Inspections: Conduct visual checks for leaks, damage, and wear.
- Calibration and Testing: Perform regular calibration and functional testing to ensure accurate response and precise positioning.
- Air Filtration: For pneumatic positioners, ensure clean and dry air supply by regularly replacing filters and maintaining appropriate air pressure.
- Lubrication: Apply suitable lubricant to moving parts like shafts and bearings to minimize friction and wear.
- Documentation and Records: Maintain comprehensive records of inspections, calibration results, and repairs.
- Spare Parts Management: Keep essential spare parts readily available.
- Training and Expertise: Ensure maintenance personnel are well-trained.
The actuator mechanism requires periodic calibration and adjustment. Positioners need regular cleaning and verification of control signals. Annual maintenance typically involves a complete valve disassembly, component inspection, replacement of wear items, actuator overhaul, and positioner recalibration. This includes annual to biannual overhauls (every 1–2 years) to recalibrate actuators or positioners. Control valve positioner calibration and diaphragm condition checks should occur every 3–6 months.
Valve seat leakage is a common issue that can cause instability. This leakage can stem from several factors:
- Leakage from the Sealing Surface: This can be due to unevenly ground sealing surfaces, a suspended, incorrect, or worn top center connection between the valve stem and closing part, a bent valve stem, or incorrect assembly causing the closing part to be skewed or misaligned. Additionally, the sealing surface material or overall valve type may not be suitable for its application.
- Leakage Caused by Poor Closure: This occurs when closing mechanisms get stuck or exceed the top dead center, leading to damaged or broken connections. It can also result from a loose or detached closing piece, or if the valve’s construction materials are not resistant to medium corrosion and mechanical abrasion.
- Valve Not Fully Closed: Obstructions like dirt buildup, rust, or line debris prevent the valve seat from closing completely, leading to leaks.
- Damaged Sealing Surface: Scratches, bumps, crushing, or corrosion on the sealing surface can create gaps and lead to leakage.
- Inappropriate Valve Stem Length: An incorrect stem length can result in insufficient movement, creating a gap between the valve core and seat, preventing full contact and causing internal leakage.
- Deformation of Valve Core and Valve Seat: Defects from casting/forging, such as pinholes or abrasions, can lead to intensified chemical corrosion. The passage of corrosive media (e.g., strong acids/alkalis) and fluid flushing can cause erosion or cavitation, deforming the core and seat (e.g., becoming elliptical) and creating gaps that result in internal leakage.
These issues prevent the valve from achieving a tight shut-off or stable control, contributing to hunting. Regular inspection and replacement of worn parts prevent these problems.
Correcting Regulating Valve Sizing and Selection
Incorrect sizing and selection of a regulating valve are frequent culprits behind hunting. An oversized valve struggles to precisely meet the desired flow or pressure set point, leading to constant overcorrection and instability. Conversely, an undersized valve causes inadequate flow, forcing the system to compensate with increased pump head pressure. This leads to high differential pressure and cavitation, which results in high vibration, noise, rapid destruction of valve seals and seats, reduced valve life, and potential corrosion and leaks in piping.
Proper sizing involves calculating the correct flow coefficient (Cv) for the specific application. Different media types (liquids, gases, steam) require specific flow coefficient calculations due to their unique physical properties and behavior. Calculations consider factors such as density, temperature, and pressure drop to ensure accurate valve sizing. Understanding distinct formulas for each medium helps optimize fluid system performance and prevent issues from improper valve sizing.
| Flow Condition | Fluid Type | Cv Equation |
|---|---|---|
| Sub-Critical Flow | Liquid | Cv = q ( g / ΔP )^(1/2) |
| Gas | Cv = ( Q / 963 ) ( ( G × T ) / ( ΔP × ( P1 + P2 ) ) )^(1/2) | |
| Steam | Cv = W / ( 2.1 [ ΔP × ( P1 + P2 ) ]^(1/2) ) | |
| Critical Flow | Gas | Cv = Q ( G × T )^(1/2) / ( 750 × P1 ) |
| Steam | Cv = W / ( 1.65 × P1 ) |
Symbol Definitions:
| Symbol | Definition | Units |
|---|---|---|
| Cv | Valve flow coefficient | — |
| g | Specific gravity of liquid | — |
| G | Specific gravity of gas | — |
| P1 | Upstream pressure | psia |
| P2 | Downstream pressure | psia |
| ΔP | Pressure drop (P₁–P₂) | psi |
| q | Liquid flow rate | U.S. GPM |
| Q | Gas flow rate | SCFH |
| W | Steam flow rate | lb/hr |
| T | Flowing temperature | °R (460+°F) |
The flow coefficient for liquids is based on the flow rate of water in GPM at 60°F with a 1 psi pressure drop across the valve. Key factors influencing a valve’s flow coefficient include its internal geometry, fluid properties (viscosity, density, temperature), valve size, and the presence of piping reducers.
Beyond sizing, selecting the appropriate valve trim type is also crucial. Flow characteristics describe the relationship between the valve coefficient (Cv) and the valve stroke. This determines how much fluid passes through the valve at various positions. Linear characteristic valves are better for control when most pressure drop is across the valve and upstream pressure is constant. Equal percent characteristic valves provide better control when piping and downstream equipment cause significant system resistance.
Rangeability is the ratio of maximum to minimum controllable flow. It indicates a valve’s ability to handle a wide range of flow rates. Several factors influence rangeability:
- Valve geometry: The design of the valve body and the regulating element inherently influences rangeability.
- Seat leakage: Excessive leakage can cause instability as the valve lifts off its seat, negatively impacting rangeability.
- Actuator: The stiffness of the actuator affects the stability of the valve’s movement, which in turn limits its ability to control smaller flow rates and thus its rangeability.
Proper selection ensures the valve operates effectively across the required flow range without hunting.
Achieving regulating valve stability demands systematic troubleshooting. Proper system design and careful component selection are paramount for preventing instability. Proactive maintenance and correct tuning reinforce reliable operation. These integrated practices ensure efficient, stable, and predictable control loops, ultimately preventing costly disruptions and optimizing process performance.
FAQ
What is regulating valve hunting?
Regulating valve hunting describes a control loop instability. The valve continuously oscillates around its setpoint. This causes fluctuations in process variables like pressure or flow. Operators often notice these issues.
Why is correct valve sizing crucial?
Correct valve sizing prevents instability. An oversized valve overcorrects, causing hunting. An undersized valve leads to inadequate flow, high differential pressure, and cavitation. Both scenarios compromise control.
How does improper control loop tuning cause hunting?
Improper tuning, especially aggressive integral or derivative actions, leads to overcompensation. This causes oscillations to grow. The result is valve hunting and closed-loop instability. Proper tuning is essential.
Post time: Dec-20-2025